Pages

30 DAY COLORING CHALLENGE - SOMETHING A LITTLE DIFFERENT

Thursday, March 2, 2017

I am very lucky to have my own craft room (small, but mine) but my husband really likes when we watch TV together at night so I took one of his, now unused, stainless steel surgical carts and turned it into a coloring cart.  I put most of my coloring mediums onto the cart (no ink pads, no Tim Holtz crayons etc) just stuff that I can sit in the living room at night and color while we watch TV. I can wheel it anywhere in the house or back into my craft room.  My Raskog cart from Ikea stays in my craft room and now holds miscellaneous papers, envelopes and foil.  If you like and find this useful I'd be so happy to hear from you.


EVERYTHING ON BOTTOM SHELF IS IN A PERFECTLY SIZED WINE BOX!

COPICS BEING USED ARE IN THE JAR TO THE RIGHT


 COPIC STORAGE:TJANDTHINGS ON ETSY
Share to Facebook Email This Share to Twitter Pin This

30 DAY COLORING CHALLENGE DAY 2

Day 2 - This is is one if the images I stamped in preparation for the challenge and it is embossed in gold.  I used Copics to color with a little bit of color pencil.  For the background I mixed a few drops of BV29 with about 15 drops of 0 blender solution into a tiny bottle and painted it on with a waterbrush filled with blender solution.  I didn't add any texture but left it very soft.  I went back over areas that I wanted darker.  As usual, I can't remember which stamp company this is from but will add it as soon as I find it (I am so disorganized at the moment).
this photo is a little washed out compared to original

Share to Facebook Email This Share to Twitter Pin This

30 DAY COLORING CHALLENGE

Wednesday, March 1, 2017

I have posted a lot about the 30 Day Coloring Challenge and it is finally here! Wouldn't you know it Day 1 has arrived and I have to go to work.  I want to share an image that I started (somehow I have quite a number of these) at Copic Boot Camp but never finished.  We were using this image (sorry, can't remember who designed it) in a lesson on watercolor backgrounds using Copic markers.  I did a little bit of the background and really wanted to finish it so it was a perfect size project for this first day of the challenge.  I used Copics for the flowers and then used colored pencils for additional details and white signo gel pen.  Very simple coloring and I am glad it is finally done and ready to be made into a card.  Please excuse bad phone photography.   Just found the stamp and it is Technique Tuesday's Morning Glory. Whew!


Share to Facebook Email This Share to Twitter Pin This

WATERCOLOR PENCIL BIRTHDAY CARD

Sunday, February 12, 2017

I purchased this lovely Watercolor Card Kit by Sandi Pirrelli because the art work was so beautiful.  The kit comes with 12 watercolor cards, 12 blank envelopes, 1 foam dot sheet and 1 occasion cardstock sheet (small perforated sentiments).  The cards are 5 x 7 so there is lots of space to color or paint.  I realized when I felt the card stock that it wasn't really a high quality watercolor paper so I decided to use my new set of Albrecht Durer Watercolor Pencils  that I just received from Amazon.  I was interested in these because unlike my beloved Inktense pencils they are watercolor pigment and not ink however, whether it was the paper, the pencils or my technique but the blending was not as I hoped.  I will try the next card with the Inktense pencils and maybe one with my Copics(which I am the most comfortable with).  It is possible that the paper that these cards are printed on might hold up with real watercolors but it seems too lightweight for that.

After I finished with the coloring I decided that I wanted to cut the card in two and only use the colored front to make a more substantial card. I cut down the size so I could mount it with foam tape on PTI Autumn Rose card stock.  I embossed the Sentiment from Mama Elephant with Versamark Ink and embossed with Filagree Gold embossing powder on Bazzill 40lb vellum and adhered Simon Says gold sequins.  Oh, and I couldn't resist a little Wink of Stella Clear on the flowers!


mama elephant, watercolor birthday card,


Share to Facebook Email This Share to Twitter Pin This

BIRCH PRESS DIES BIRTHDAY CARD

Thursday, February 2, 2017

Wow, I can't believe I haven't posted anything since mid December.   Instagram is so easy it has made me lazy about blogging.  Here is a card I made with a Birch Press die, DAZZLE. These dies are amazing even though at first they seem really expensive but you get three full dies that can be used as stand alone or combined. I used a combination of silver glitter paper and silver mirror paper to create a special 18th birthday card.  The number is out of a PTI shimmer paper that looks flat in the photo but which really does shimmer.  The card is very simple but very elegant.  I think this would be great for a wedding card also.  Since making this card I broke down and ordered more of these dies and can't wait to play with them.


Affiliate links:


Share to Facebook Email This Share to Twitter Pin This

12 TAGS OF CHRISTMAS WITH A FEMININE TWIST

Wednesday, December 14, 2016

First let me say that I have fallen way behind on my Christmas Cards and won't be sending out a lot this year and as for 12 tags, Bwahaha!  Here is one that I made for my great niece and it is sort of a tag/card but being used as a tag.  Love the Memory box snowflake tag and this adorable image from MFT which I watercolored. The tag was cut from shimmer card stock, layered over a pinky red paper.
The sweet sentiment is a Lawn Fawn die also cut from the same shimmer and then I cut it to fit the tag.
mftstamps, memory box,lawn fawn,christmas cards

Share to Facebook Email This Share to Twitter Pin This

POWER POPPY CHRISTMAS WREATH

Friday, December 2, 2016

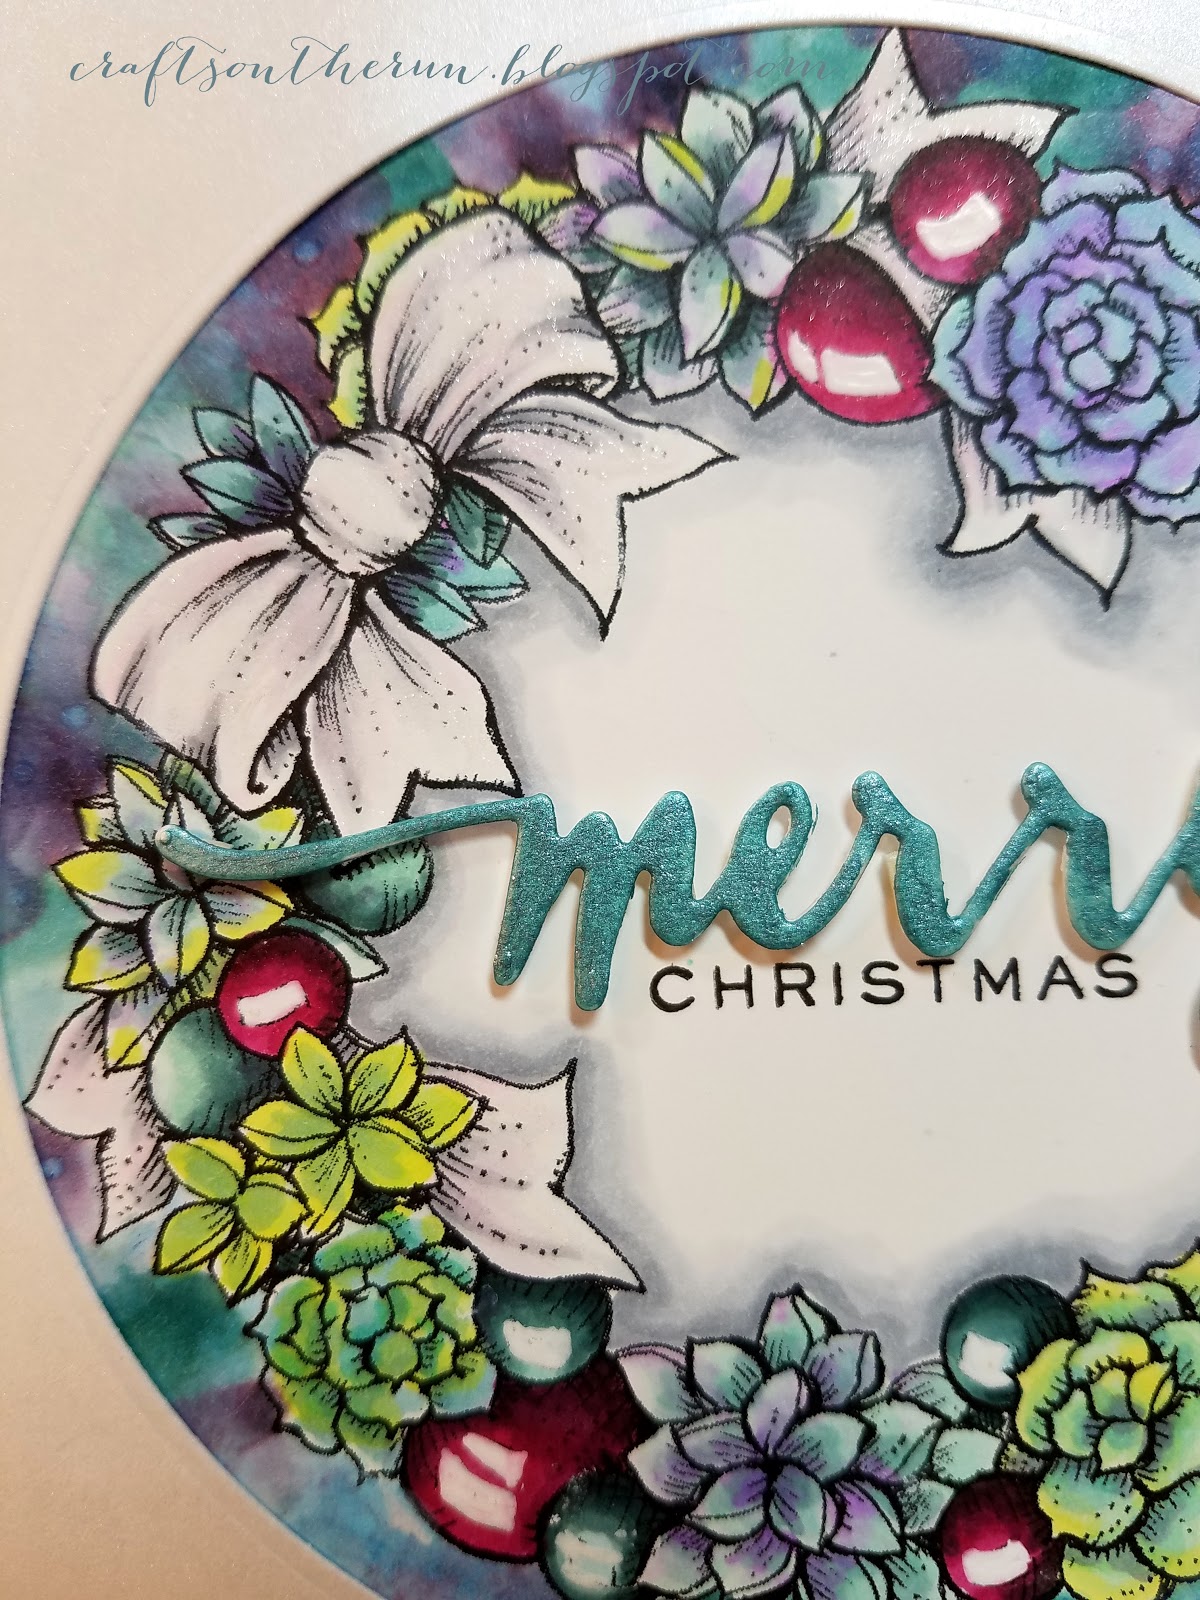
I so love this Power Poppy image but it took me quite a while to actually finish the coloring and because I sized it so large (4 1/2 inches) I wasn't sure what I was going to do to make the card.  I die cut it in a circle thinking I would make a frame but I didn't like that so instead I used a circle die to just overlay it.  I kept the sentiment simple, a Wplus9 Merry die (colored with Spectrum Noir Shimmer Pen and also used clear on the red ornaments)and the Christmas word from their Festive Greetings. The white shimmer paper is from PTI which kept it simple but pretty.  I really wanted the image to be the primary focus.  Hope you all like it and I would love to hear from you!


Power Poppy, Christmas Wreath, Christmas Cards


Share to Facebook Email This Share to Twitter Pin This