Pages

ONLINE CARD CLASSES: HOLIDAY STYLE DAY 7 SHIMMER AND SHINE

Thursday, November 19, 2015

online card classes holiday style, power poppy, christmas card.


This is the first card I made for the shimmer and shine day.  I embossed the background and the image with versamark and embossed with Filagree gold embossing powder.   blended distress inks over the embossed background in two colors giving an ombre effect and also colored the image with distress inks. Some pearls and a few sequins finished it off.
The card base is MFT Elf green which has been my go to green this season.


IMPRESSION OBSESSION GREENERY
POWER POPPY POINSETTIA
DISTRESS INKS
COPICS
GOLD EMBOSSING POWDER
NEENAH SOLAR WHITE


Share to Facebook Email This Share to Twitter Pin This

ONLINE CARD CLASSES: HOLIDAY STYLE MASKING

Sunday, November 15, 2015


Onlinecardclasses, Wplus9, copic markers, Christmas Cards


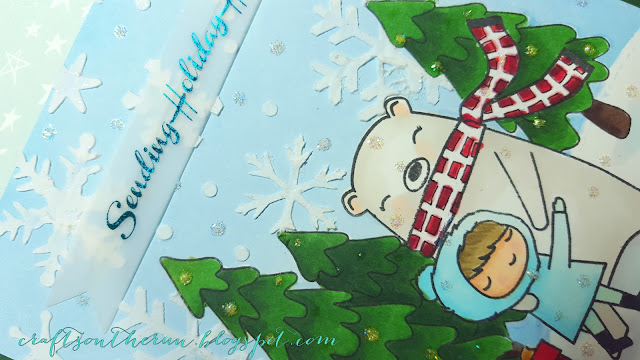
You can see the stickles here but not the subtle glitter in the snowflakes


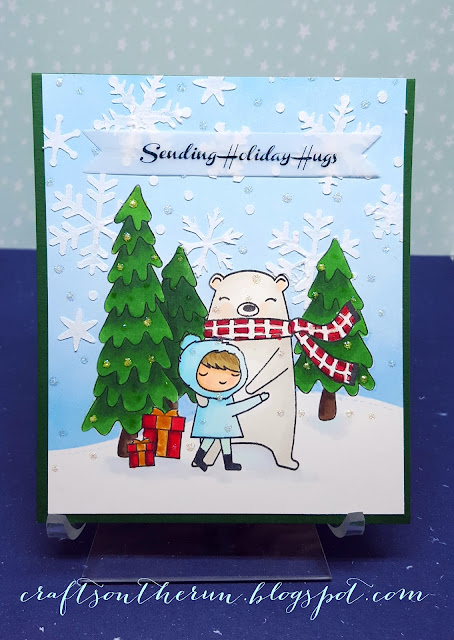
Day 5 was cutie patooties and I opted to try out a one layer card with masking. Laura Bassen's card was just to adorable to resist and I wanted to get all the layers correct. I started by stamping the small gift and then worked my way backward, masking each layer. When all the stamping and masking was done, I blended my sky with Amuse Pigment inks.  I just love using pigment inks for blending.  When the ink was dry (the next day cause it was very late at night and bed was calling) I used Carte Bella snowflake stencil with Aleene's glitter snow embossing paste.  When that was completely dry, I pulled off all the masking paper and colored the images with Copics.  The ribbons and bows are painted in gold but they don't show up well in the photo. I used StarDust stickles all over for an added glittery snow effect.  After I finished the card I realized I totally forgot a sentiment and also the card was warped so I cut it down and adhered it to a green card base which solved the warping problem and I typed and foiled a greeting and adhered that to the top.  Hope you like it.


 WPLUS9 Holiday Hugs
PTI Double ended banners

Share to Facebook Email This Share to Twitter Pin This

SPARKLY ORNAMENT CHRISTMAS CARD

Tuesday, November 10, 2015

Christmas Card


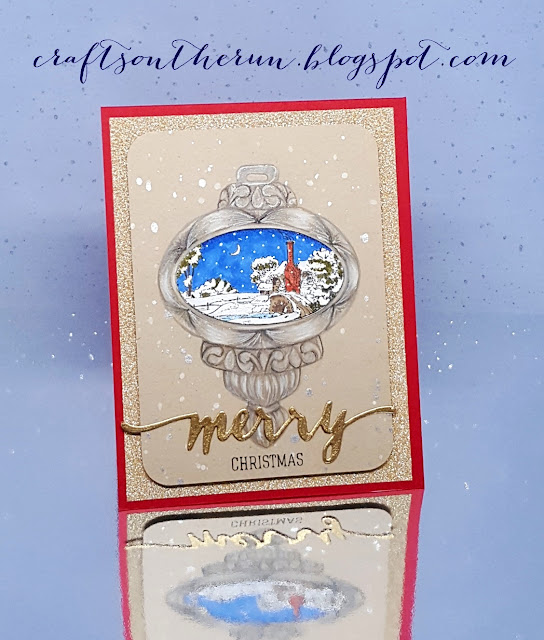
One of the things I love about taking OCC's Holiday Style class is that it revs me up and gets me into high creative gear.  I colored this image  over the summer and never did anything with it but I pulled it out to finish. Got to get those Holiday cards made!
One of the problems I had was combining colored pencils on the kraft paper with wanting to use my copics for the scene to make it bright and stand out.  I used my Faber Castell Polychromos and a silver metallic pencil on the ornament and restamped on X-Press It paper then colored just the center with  Copics, cut it out and adhered. 


I used Wink of Stella Clear over the pencils to add some shimmer, which you can see in the photo below.  I cut the die out of the matching red card stock and embossed it with Filagree detail gold.  I also masked the ornament and spritzed with white and silver misters.


Lastly, I adhered the image to Tim Holtz Glitter Sheet with dimensional adhesive.  Woohoo another card done!


CREATIVE EXPRESSIONS ORNAMENT CLING STAMP
SIMON SAYS CIRCLE SAYINGS HOLIDAY
WPLUS9 MERRY WORD DIE
HERO ARTS UNICORN MISTER
TIM HOLTZ DISTRESS SPRAY BRUSHED PEWTER

Share to Facebook Email This Share to Twitter Pin This

ONLINE CARD CLASSES: HOLIDAY STYLE - DAY 1

Monday, November 9, 2015

I was in a total tizzy of excitement waiting for class to start but on Friday I realized that my craftroom was too much of a disaster for me to work in. So, project for the weekend was to clean up, purge and get ready to play.  As usual, day one of class did not disappoint and there were some wonderful ideas.  I particularly loved Debby Hughes card and even though I didn't have the particular die that she used, I picked one that I thought would work in a slightly different way.  Memory Box die Frostyville had hills and valleys at the top even though the bottom was straight so I could cut and curve my stamp the way Debby did. I brushed on the platinum paste. Then I die cut my snowflakes and partially glued them onto the card.  The card base is Stampin Up matte silver double sided card stock (stash).  I then added some gems to the snowflakes and under the sentiment.  I am using my new Foldio light box but still not completely happy with the pics.  Couldn't get all the shine to show up


MEMORY BOX FROSTYVILLE DIE
SIMON SAYS SNOWFLAKES
SIMON CIRCLE SAYINGS HOLIDAY
RANGER LIQUID PLATINUM EMBOSSING POWDER
INKA GOLD PLATINUM
JEWELS: STASH

Share to Facebook Email This Share to Twitter Pin This