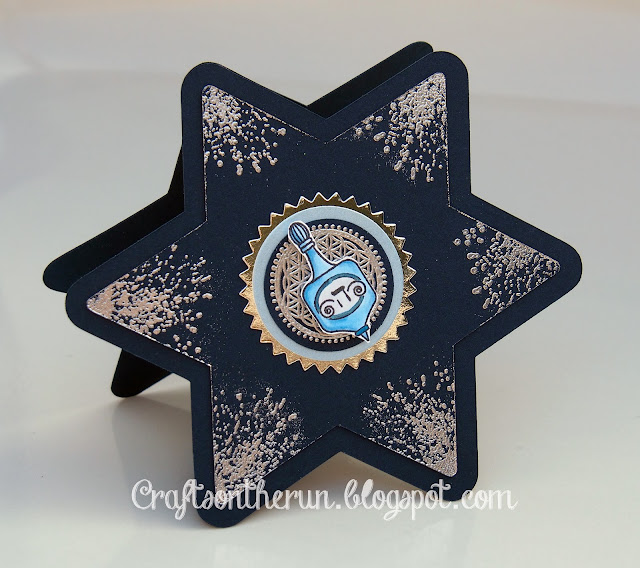
Here is the Hanukkah card (I lifted the center medallion idea from Nichole Heady) using Papertrey Ink's Mazel Tov. I originally wanted to add an embossed border around the edges but decided on Hero Arts Paint Spots instead and Filigree silver embossing powder.The star was cut (with offset) on my Cameo. Easy to make assembly line and I will use it as my Hanukkah card for this year. There is a stamped and silver embossed sentiment inside. As you can see with a 6 pointed star, it stands at a tilt. Paper is MFT Nightshft blue and I am still struggling with my white balance on my pics.
TWO THANKSGIVING CARDS
Sunday, October 27, 2013
What a crazy couple of weeks.On top of needing two birthday cards and I got a card commission for two baby's first Thanksgiving and Hanukkah cards. I knew I wanted to make two similar cards, not identical but easy to replicate and the Hanukkah cards I wanted to be identical. Since I love using Distress inks I started with a blended background, slightly different for each card. I then stamped HA tiny stars on both, one got silver embossing and the other holographic. I used Lawn Fawn and Simon Says for the stamps, Papertrey Ink for the words and Lawn Fawn and Papertrey Ink for the leaves
Labels:
Copic Markers,
Distress Inks,
Lawn Fawn,
Thanksgiving
SCRAP PAPER STORAGE BOX FINISHED
Tuesday, October 1, 2013
EASY FIX. COVER IN PATTERNED DUCT TAPE (THIS ONE IS PLATYPUS FROM AMAZON)
AND THEN A CONTRASTING STRIPE OF WASHI. PERFECT MATCH TO MY RASKOG CART!
SEE PRIOR POST HERE
PAPER SCRAP STORAGE DE-MYSTIFIED
Friday, September 27, 2013
Searching the universe for paper scrap storage ideas? I was. My
scrap storage was a total disaster; actually it was tidy but useless. Paper scraps were in Cropper Hopper envelopes that were too deep and unwieldy and hard to use. I also had a drawer and a bunch of other piles of scraps lying around because I hate to file. Worse still I also never bothered to look through my scraps because "outta sight......"
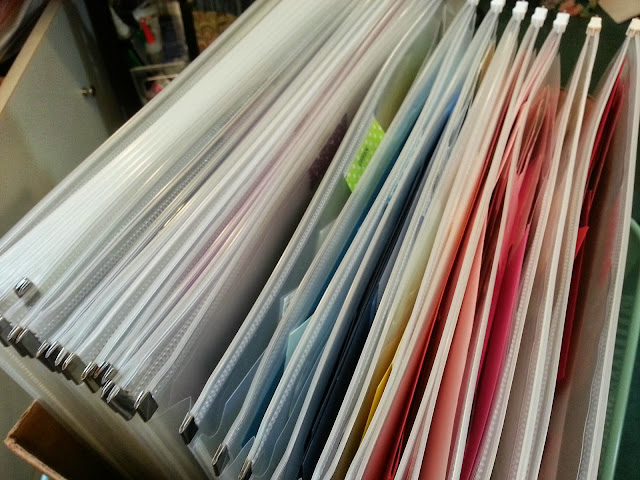
But I love my Raskog cart from Ikea and I thought that the top of it would be a great place to put a scrap filing system. On the top of the cart I placed a cardboard box that measures 8.25” x 14.25” x 7.5” tall. I already had about three of these ITOYA PolyZip envelopes, PZ-20CR but I ended up buying about 17 more from the Office Dealer. For only $1.69 they weren't a big investment and they are great for all kinds of storage. In addition to the envelope space which zips closed, there is a front pocket. I store my solid papers in the large envelope and in the front pocket I store all the patterned paper. I have lately been putting some patterned scraps back in their pads to keep them together but these are all old scraps. It is very, very convenient. I just pick the envelope I want and can take it right to my work table. On the little front tab I put a coordinating piece of Washi tape and P-touched a small label. Now I just need to decorate the hideous box. Any ideas?
My catagories are: ROYGBIV, pink, kraft, grey, Halloween, Christmas, Metallics and shimmers and I will probably have a separate one for 7 x 7" papers cut for albums but didn't get used.
Also great as project storage.
 |
| Add caption |
 |
| Can you see the section in front of the zippered pocket? |

HYBRID HALLOWEEN CARD
Tuesday, September 17, 2013
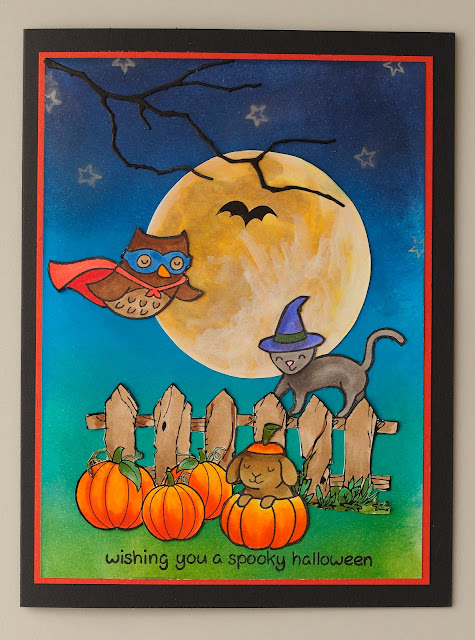
I’ve been wanting to try my hand at Distress Ink
Background and a Halloween card for my grandson seemed like the perfect way to
do that and to use some of my new Lawn Fawn stamps. I also wanted a background scene image so I used
Make it Crafty’s Eerie Scene digi image but fussy cut it and layered onto the
background.
The moon was the hardest image to create from a blank
circle. I downloaded a photo from the
internet and then just tried to copy it with copics. It was so so but I then added Wink of Stella
white and clear and that really perked it up although it was hard to photo (you can't see how it shines and the white looks globby).
I love the way the colors
pop on the card but I don’t like my afterthought of the added silver stamped
stars. I think they are too big for the
scene. The distress ink background was fun to create and I think I will be using this technique a lot. The colors are amazingly vibrant. All the images were colored with copics.
I hate fussy cutting but i wanted the stamped
images to look like the digi images so didn't want the extra white border.
 |
 |
You can't see the Wink of Stella glitter on
the wings in the photo but it looks great in person
|
SUPPLIES USED:
DISTRESS INKS: SALTY OCEAN, MOWED LAWN, CHIPPED SAPPHIRE,
PEACOCK FEATHERS. INSIDE OF CARD-
FESTIVE BERRIES, RIPE PERSIMMON, SPICED MARMALADE, MUSTARD SEED AND SQUEEZED
LEMONADE.
STAMPS:
LAWN FAWN: CRITTERS IN COSTUME, HOPPY HALLOWEEN, TRICK OR
TREET
PAPERTREY INK: BEEN BOO’D
MEMORY BOX GROVE BRANCH DIE
WINK OF STELLA WHITE AND CLEAR
MAKE IT CRAFTY DIGITAL IMAGE: EERIE SCENE
Labels:
Copic Markers,
Distress Inks,
Halloween,
Lawn Fawn,
Make It Crafty
RANDOM THOUGHTS ON BLOGGING
Wednesday, August 21, 2013
I just read a great blog by Victoria Elizabeth Barnes . She writes whatI want to write (but she writes about remodeling) in the way that I want to write it but somehow don't. Maybe that's because I mostly write in my head, like random thoughts composing themselves into an almost perfect blog post with no spelling or grammatical errors. But, then I make breakfast and I can't remember ANYTHING. I want everyone to read my blog, I am desperate for you to read my blog but I forget to write my blog. You do see that this is a problem. So, the eggs are congealing in a bowl, my husband is unfed but, drum roll, I am writing this down by hand, with a pen, not too legible but legible enough that I was able to transcribe it. Should I get a voice recorder app for my phone? I hate the way I sound on recordings but I have to find someway of getting what is in my head onto my blog. When I sit down to write, no thoughts come. As I am drifting off to sleep, I write great stuff, remembering none of it in the morning. Have you had this problem? Have you solved it? Please write, send postcards, texts, I need HELP! I even have a sizable stash of cards that need posting that are rotting in the computer (can cards go bad or will they just fade away?).
MORNING GLORY BIRTHDAY CARD
 |
| Silhouette image and Memory Box Vivienne butterfly die |
I found this beautiful floral paper from Anna Griffin (dated 2001 no less) in my stash and I had TONS of it. I must have bought it for invites but who remembers. I stamped my image on X-press blending and colored with copics using online images as a color reference. I really like the way the image turned out but it looked much brighter than the paper, which also had a very antiquey off white background. GRRR. The butterflies and dies were spritzed with Mr. Hueys Calico Shine. This was my Mom's birthday card last September when she turned 91! (just a wee bit late with posting)
Labels:
Birthday,
Copic Markers,
Serendipity Stamps
SUMMER CARD CLASS 2 WEEK 2
Thursday, July 18, 2013

Loved this class but I was up in Mammoth Lakes with NO supplies. Here is a card that I made for week two using just what I had on hand. Papertrey ink Pretty Peonies for the flowers and Tombow duel brush pens to create the brown background. Didn't love the card and was so annoyed that I didn't have more to work with but I thought I'd post it anyway.
PAPERTREY INK COMFORT FOOD BIRTHDAY CARD
Tuesday, May 14, 2013
PAPERTREY INK MOTHER'S DAY CARD WITH PEARL EX AND PERFECT PEARLS
Saturday, May 11, 2013
 |
| PAPERTREY INK ROSIE POSIE |
 |
| DETAIL OF PEARL EX AND PERFECT PEARLS |
 |
| PAPERTREY INK BOUTIQUE BORDERS: MOTHER. COMBINED GOLD INK PAD OVER COLOR INK PAD AND I LOVE THE LOOK! |
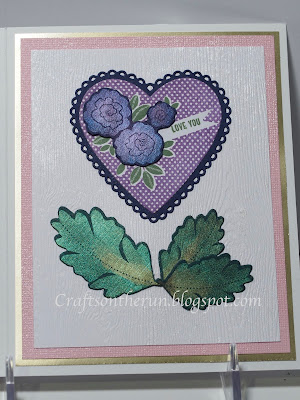 |
| INSIDE OF CARD WITH ALL MY HEART |
I haven't used my perfect pearls in AGES (decades?) anyhoo, after watching Nichole Heady using perfect pearls I decided to have a go at them for this special card. I spritzed the card stock( Bazill pink) with Mr. Huey calico shine and also the white wood grained paper. I stamped the die cut images with Versamark and then applied the pearl ex and perfect pearl colors with a soft brush. Blending is fun and the colors really do stand out on the dark papers. All in all, I am pretty happy with the way this card turned out. Hubby's birthday tomorrow and will post his card AFTER he gets it. Happy Mother's Day!
SUPPLIES:
Ranger Archival stamp pad olive
Palette hybrid stamp pad violet
Spellbinders Petite Scallop Die
Gold card stock stash (might be creative memories)
Labels:
Mother's Day,
Papertrey Ink,
Perfect Pearls
STAMP STORAGE AND THANK YOU TO JENNIFER MCGUIRE!
Thursday, April 18, 2013
I’m resigned to the fact that my own tiny craft room will always be in a state of flux, since I’m forever experimenting with new and clever ways to sort all this STUFF and cram it in somewhere. I'm not really complaining- well maybe I am- I actually HAVE a room but I will be forever thankful to Jennifer McGuire and her stamp storage post!
Here is what I do;
Here is what I do;
1. Clear stamps in CD cases and some in Stampin Up plastic stamp boxes
2. Unmounted rubber background just stacked up
3. Wood mounted stamps are in old DMC yarn storage drawers (from my defunct needlepoint store)
4. Clings are in four large binders
I am sure you can see that there are a number of problems with this. The stamps are all over the place, the clings in the binders I never remember to use (I need everything visually accessible) and putting stamps into the CD cases is tedious.
What Jennifer McGuire has done is to put all her stamps into envelopes that she can flip through. I was INSPIRED. I love the idea of just flipping through the envelopes as that's how I store my dies and it really works for me. See this post.Die Storage. I decided to buy a couple Avery Elle stamp envelopes and see how they really work. I AM IN LOVE, LOVE, LOVE with these things. I cut cheap white cardstock for a background in each envelope and labelled the front of the envelope with my P-touch (everything I have is labelled with P-Touch and I should by stock in the company). In two seconds the stamps were transferred into their new home and ready to flip through. I am waiting for the refrigerator box Fridge Binz - Amazon Prime that Jennifer recommends and then I will transfer the clings from the binders into the envelopes. The stamps that already in the CD cases I will leave but maybe move all the sentiment stamps to the new system.
These envelopes works for all clear stamps including Papertrey Ink (just stick the enclosed label right onto the acetate) and this is so FAST and EASY. I've had four PTI sets still sitting in their boxes because I haven't had time to put them in CD cases and it took longer to get them out of their boxes than it did to get them into the new envelopes. And let's talk about how reasonably priced these are. 3 for $1.00. Can't do better than this.
These envelopes works for all clear stamps including Papertrey Ink (just stick the enclosed label right onto the acetate) and this is so FAST and EASY. I've had four PTI sets still sitting in their boxes because I haven't had time to put them in CD cases and it took longer to get them out of their boxes than it did to get them into the new envelopes. And let's talk about how reasonably priced these are. 3 for $1.00. Can't do better than this.
SUPERFAST (for me) BIRTHDAY CARD
Tuesday, April 9, 2013
Saturday baby party at four pm. Got home at 3 and of course, no card! Run and buy one, silly me, way to easy. What can I do really fast (not much) but let's give it a whirl. Whoots stamp, easy peasy coloring, Kraft card, with pink Bazzill background, quick die cut, pearls, googly eyes and OMG, I was done in 20 minutes in full panic mode.
 |
| Love those Whoots stamps- especially with googly eyes with lashes |
Labels:
Art Impressions Whoots,
Birthday,
Copic Markers
YARNHARLOT BLOG
Sunday, March 24, 2013
So I've had a head cold and a sore throat and swollen glands which has reduced me to a state of infantile grouchiness. In addition to the above miseries I started to read a new Harlan Cobin mystery, Six Years,before I went to sleep last night and it was calling to me in my dreams. When my husband woke me with an errant elbow to my head, I figured it was time to get up (1:30 am) and read (till 5:30am) when I finished the darn book. Now I am foggy headed and abusing my iPad and listening to watching Maria Sharapova in the Miami quarterfinals. Unable to move from the sofa, still in my bathrobe and fuzzy slippers I was doing a search for a knitting technique when I came upon this blog, Yarn Harlot http://www.yarnharlot.ca/blog/. written by Stephanie Pearl-McPhee.
I am sure many, most? of you knitters out there may be familiar with her but I mostly read paper crafting blogs and paleo food blogs. In addition to her blog she has a number of books on Amazon. Even if you don't knit you should read this blog. This woman is extremely funny and made me laugh out loud and generally took me out of my crankiness. If I had more of a voice today, I would be reading it outloud to my husband but I can't and I refuse to relinquish my iPad to him. She started the blog in 2004, and that's where I started reading. Oh dear, this may keep me up another night. Maybe I better nap.
I am sure many, most? of you knitters out there may be familiar with her but I mostly read paper crafting blogs and paleo food blogs. In addition to her blog she has a number of books on Amazon. Even if you don't knit you should read this blog. This woman is extremely funny and made me laugh out loud and generally took me out of my crankiness. If I had more of a voice today, I would be reading it outloud to my husband but I can't and I refuse to relinquish my iPad to him. She started the blog in 2004, and that's where I started reading. Oh dear, this may keep me up another night. Maybe I better nap.
PAPERTREYINK SUNFLOWER BOUQUET BIRTHDAY CARD
Saturday, March 23, 2013
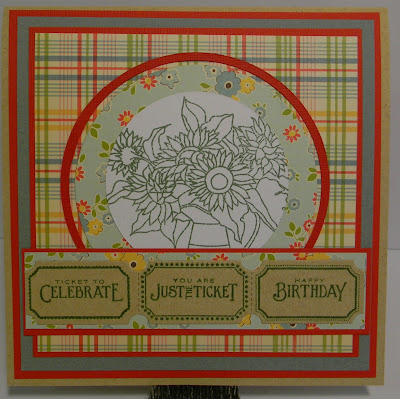
I think this was one of my favorite cards this year. Very bright and cheerful for a very dear friend whose birthday was last September.
STAMPS USED PTI SUNFLOWER BOUQUET, MODERN WOOD MATS, JUST THE TICKET DIE AND STAMP, SIMPLE SENTIMENTS
COPICS YG21,YG23, G12, G24,G46,Y21,Y35,G21,YR09,Y04,YR04,BG70-72-75; E42-42-44-89
INKS HERO ARTS CUP O JOE, WET CEMENT
DIES SPELLBINDERS SIMPLE CIRCLES
PAPERS
EMBELLISHMENTS
TOOLS: BIG SHOT, MARTHA STEWART SCOREBOARD, MR. HUEY WHITE SPRAY
 |
STAMPS USED PTI SUNFLOWER BOUQUET, MODERN WOOD MATS, JUST THE TICKET DIE AND STAMP, SIMPLE SENTIMENTS
COPICS YG21,YG23, G12, G24,G46,Y21,Y35,G21,YR09,Y04,YR04,BG70-72-75; E42-42-44-89
INKS HERO ARTS CUP O JOE, WET CEMENT
DIES SPELLBINDERS SIMPLE CIRCLES
PAPERS
EMBELLISHMENTS
TOOLS: BIG SHOT, MARTHA STEWART SCOREBOARD, MR. HUEY WHITE SPRAY
ONLINE CARD CLASSES PATTERN PLAY

I decided to leave the embossing on to give the bottom part of the card some heft and shine. Cut the pattern up and voila! used two techniques for patterned paper.
Art Impressions Owls Birthday Card
Wednesday, March 13, 2013
All my cards are made for specific people and this one was for a darling pre-teen's January Birthday. The Stamps are Art Impressions and they are adorable! The colors were selected to reflect the girls love of all things UCLA. The blues match in real life but not in the photo. Sorry about that.
The sentiment is on one of those shaky thingy metal things so it wiggles quite nicely.
The inside of the card was embossed with white and used PTI's large number dies and then taped the negative portion and using a dauber got this fun effect.
HERO ARTS MI CASA STAMP
Sunday, March 10, 2013
I had so much fun with this Hero Arts Stamp.
I stamped the whole image on old plaid card stock and on plain white cardstock.
I colored with copics and layered the windows, door and roof. The door was then highlighted with Glossy Accents and a silver pearl used as the handle.
It turned out to be a very cheerful card but as usual for me, hard to photograph well.
Supplies used:
HERO ARTS MI CASA STAMP
HERO ARTS SHADOW INK FOREVER GREEN
MEMORY BOX ARBOSCELLO TREE DIE
LILY OF THE VALLEY LABELS:OCCASIONS
JOLEE"S FLOWERS (STASH)
BAZZILL CARDSTOCK (STASH)
COPICS R29, R89, Y02, C3, C4, E74, E 37, E79, T4
A WHOLE LOTTA CARDS!
Saturday, March 9, 2013
I haven't posted anything in ages because Life happens! Not that I haven't been busy trying out new techniques and making new cards, I just haven't been able to share. So I am going to post some miscellaneous cards here that I don't have complete supply lists for but I do want to get them out there. These were the 3 Valentines I made, one for hubby, one for Mom and one for daughter.
The following card was my very first wedding card and I used a digital image but can't remember where it is from. I painted the image with Twinkling H2O's but they don't photograph well (like not at all) but they really added a nice but delicate shimmer.
MFT CATALINA DIE
PRINTERS FOR COPICS - TIP OF THE DAY
Friday, January 18, 2013
I have been very upset with the ink from my inkjet printer. For whatever reason it has started to smear when I use my Copics with it. I don't remember having this problem initially but it is certainly a problem now and I found the BEST solution for $99.00. I bought a laser printer! Now this isn't a totally crazed idea, laser printers are MUCH more economical than inkjet or photo-jet printers and the ink is embedded into the paper. I found a fairly compact Brother HL-2270ODW at Amazon for $99.00 Prime and I love it! This one is also wireless although it isn't a true air printer (you can download the Brother app for your iPad and it is only black and white, the color lasers were far more expensive. I tested it on X-Pressit, Neenah, and plain white cardstock and NOTHING SMEARS! Whoo hoo. Here is a link if you want to check it out.
http://www.amazon.com/Brother-HL-2270DW-Compact-Wireless-Networking/dp/B00450DVDY/ref=sr_1_1?ie=UTF8&qid=1358522564&sr=8-1&keywords=BROTHER+LASER
http://www.amazon.com/Brother-HL-2270DW-Compact-Wireless-Networking/dp/B00450DVDY/ref=sr_1_1?ie=UTF8&qid=1358522564&sr=8-1&keywords=BROTHER+LASER
Subscribe to:
Comments (Atom)


