I stamped the Memory Box Pine stamp onto patterned paper with Memento Lux Northern Pine pigment ink and then embossed with clear embossing powder. I then used a mini blender and gold pigment ink to burnish around the stamped image. I die cut the deer and used a darker green ink to add some dimension and a white gel pen for spots on their backs. The greeting was die cut out of the MFT Shimmer gold card stock and I used the same card stock for the card itself. The green card stock is MFT Elf green which I seem to have used on most of my Christmas cards this year.
MAKE IT CRAFTY: AURORA BOREALIS CHALLENGE
Wednesday, December 9, 2015
I haven't done a challenge in quite a while but trying to color, paint, create an aurora borealis intrigued me. I first colored the background with distress inks and splatted the stars. I used a dry brush and guache paints to create the aurora. After it was dry I used wink of stella clear to give it a real shimmer effect. You can sort of see it below.
The cute little snowman is Make It Crafty colored in copics and popped up with foam tape. This really was a challenge for me but I did enjoy it.
Labels:
Copic Markers,
Distress Inks,
Make It Crafty
ONLINE CARD CLASSES: HOLIDAY STYLE DAY 7 SHIMMER AND SHINE
Thursday, November 19, 2015
This is the first card I made for the shimmer and shine day. I embossed the background and the image with versamark and embossed with Filagree gold embossing powder. blended distress inks over the embossed background in two colors giving an ombre effect and also colored the image with distress inks. Some pearls and a few sequins finished it off.
The card base is MFT Elf green which has been my go to green this season.
IMPRESSION OBSESSION GREENERY
POWER POPPY POINSETTIA
DISTRESS INKS
COPICS
GOLD EMBOSSING POWDER
NEENAH SOLAR WHITE
ONLINE CARD CLASSES: HOLIDAY STYLE MASKING
Sunday, November 15, 2015
 |
| You can see the stickles here but not the subtle glitter in the snowflakes |
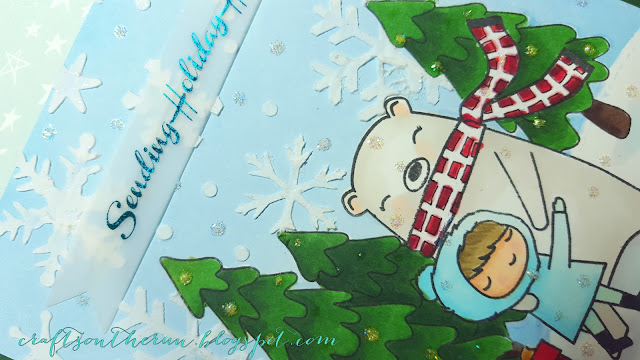
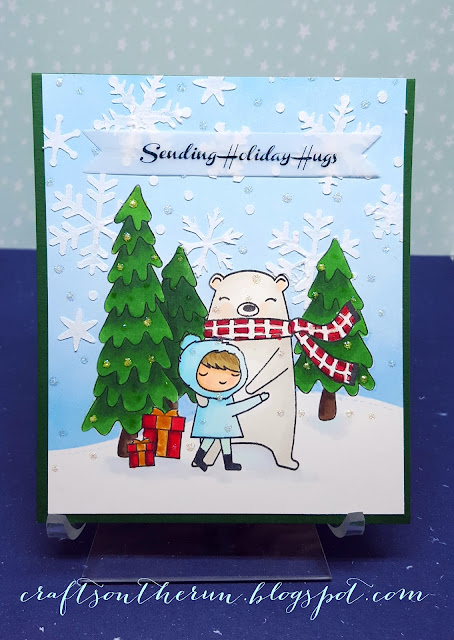
Day 5 was cutie patooties and I opted to try out a one layer card with masking. Laura Bassen's card was just to adorable to resist and I wanted to get all the layers correct. I started by stamping the small gift and then worked my way backward, masking each layer. When all the stamping and masking was done, I blended my sky with Amuse Pigment inks. I just love using pigment inks for blending. When the ink was dry (the next day cause it was very late at night and bed was calling) I used Carte Bella snowflake stencil with Aleene's glitter snow embossing paste. When that was completely dry, I pulled off all the masking paper and colored the images with Copics. The ribbons and bows are painted in gold but they don't show up well in the photo. I used StarDust stickles all over for an added glittery snow effect. After I finished the card I realized I totally forgot a sentiment and also the card was warped so I cut it down and adhered it to a green card base which solved the warping problem and I typed and foiled a greeting and adhered that to the top. Hope you like it.
PTI Double ended banners
SPARKLY ORNAMENT CHRISTMAS CARD
Tuesday, November 10, 2015
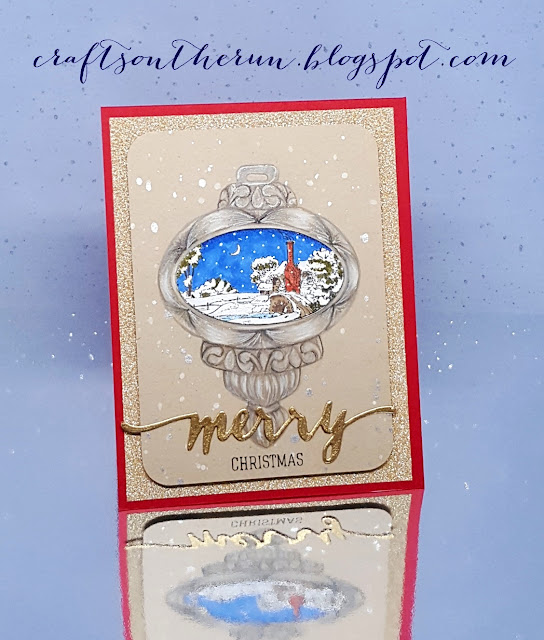
One of the things I love about taking OCC's Holiday Style class is that it revs me up and gets me into high creative gear. I colored this image over the summer and never did anything with it but I pulled it out to finish. Got to get those Holiday cards made!
One of the problems I had was combining colored pencils on the kraft paper with wanting to use my copics for the scene to make it bright and stand out. I used my Faber Castell Polychromos and a silver metallic pencil on the ornament and restamped on X-Press It paper then colored just the center with Copics, cut it out and adhered.
I used Wink of Stella Clear over the pencils to add some shimmer, which you can see in the photo below. I cut the die out of the matching red card stock and embossed it with Filagree detail gold. I also masked the ornament and spritzed with white and silver misters.
Lastly, I adhered the image to Tim Holtz Glitter Sheet with dimensional adhesive. Woohoo another card done!
CREATIVE EXPRESSIONS ORNAMENT CLING STAMP
SIMON SAYS CIRCLE SAYINGS HOLIDAY
WPLUS9 MERRY WORD DIE
HERO ARTS UNICORN MISTER
TIM HOLTZ DISTRESS SPRAY BRUSHED PEWTER
ONLINE CARD CLASSES: HOLIDAY STYLE - DAY 1
Monday, November 9, 2015
I was in a total tizzy of excitement waiting for class to start but on Friday I realized that my craftroom was too much of a disaster for me to work in. So, project for the weekend was to clean up, purge and get ready to play. As usual, day one of class did not disappoint and there were some wonderful ideas. I particularly loved Debby Hughes card and even though I didn't have the particular die that she used, I picked one that I thought would work in a slightly different way. Memory Box die Frostyville had hills and valleys at the top even though the bottom was straight so I could cut and curve my stamp the way Debby did. I brushed on the platinum paste. Then I die cut my snowflakes and partially glued them onto the card. The card base is Stampin Up matte silver double sided card stock (stash). I then added some gems to the snowflakes and under the sentiment. I am using my new Foldio light box but still not completely happy with the pics. Couldn't get all the shine to show up
MEMORY BOX FROSTYVILLE DIE
SIMON SAYS SNOWFLAKES
SIMON CIRCLE SAYINGS HOLIDAY
RANGER LIQUID PLATINUM EMBOSSING POWDER
INKA GOLD PLATINUM
JEWELS: STASH
MO MANNING HOBSON HALLOWEEN CARD
Thursday, October 8, 2015
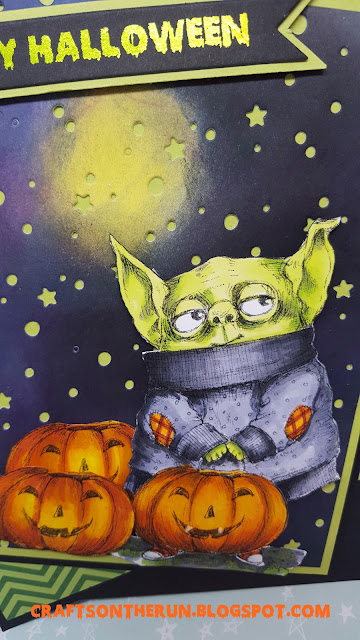
I fell in love with Hobson as soon as I saw him and purchased both versions. He is as cute as can be and so much fun to color. For the Happy Halloween, I printed the text on black card stock on my laser printer and then foiled in green. I also printed up extra pumpkins and fussy cut everything to layer. The background is blended distress inks and then cut with Lawn Fawn Snowy backdrop die and layered over MFT sour apple card stock.
COPIC SKETCH MARKERS USED:
BV 23,25,28 N5, N3
YR4, YR15, YR27, YR68, E08
YG01,YG03, YG17, YG23,
Labels:
Copic Markers,
Distress Inks,
Halloween,
Lawn Fawn,
Mo Manning
ONLINECARDCLASSES: WATERCOLOR FOR CARD MAKERS- No line watercoloring
Monday, September 28, 2015
JENNIFER DOVE (just4funcrafts) SUNFLOWER STAMP BIRTHDAY CARD
Sunday, June 28, 2015
Ooh, I had so much fun coloring this stamp. It is my step-daughter's big 50 birthday so I made this for her. Colored with copics of course!
SIMON SAYS STAMPS FARM ANIMAL BIRTHDAY CARDS
Friday, June 26, 2015
I love coloring these little animals for cute and quick birthday cards.
SIMON SAYS STAMPS FARM ANIMALS
CLEAR AND SIMPLE GRASS STAMP
LAWN FAWN CARD
SIMON SAYS TILTED BANNER DIE AND SENTIMENTS
SIMON SAYS STICHED SLOPES AND HILLS
SIMON SAYS STAMPS FARM ANIMALS
CLEAR AND SIMPLE GRASS STAMP
LAWN FAWN CARD
SIMON SAYS TILTED BANNER DIE AND SENTIMENTS
SIMON SAYS STICHED SLOPES AND HILLS
KURETAKE CLEAN COLOR REAL BRUSH STORAGE SOLUTION
I love these brush watercolors except for the fact that the ID numbers are sooo small and located at the bottom(why?) of the pen. So here is my solution for saving my eyes. PTouch the number and stick it on the cap! Simple and easy. I did also put the colors on top but when I put a few drops of glossy accents on, the colors changed somewhat so not a reliable color reference for me. I did print up Jennifer McGuire's blank color chart and that was really useful. For storage, I had a 72 Copic Wallet that I wasn't using for my copics and it works perfectly for the brushes, the stay upright, are easy to see and are totally portable.
30 DAY COLORING CHALLENGE
Tuesday, June 16, 2015
YES! In the midst of having painting done in the house I finally had a chance to post some of the coloring I've been doing. No cards made yet (typical) but lots of coloring. Here is Gnomes from MFT, obsessed with these adorable little guys.
COPIC ORGANIZATION- GRRR and AHA!
I have had a major problem with copic storage. I love to look at them all lined up neatly in my craft room but I like to sit with my husband in the evenings and color while I am bored am watching tv. Here is what I first used. I know a lot of people have created their own storage using these plastic grids from Home Depot but I found that my pens didn't pull out easily and occasionally the cap caught and pulled off. Made me crazy.

I then invested (on sale) a full set of Crafter's Companion Ultimate Pen Storage
which worked GREAT! Except......Not portable. When I took the Copic Certification classes a few years ago, Copic was just coming out with their large totes and we each got one for taking the class. Woohoo! I really found the little bag thingies that came with the tote irritating, the pens would fall over and I spent too much time searching for colors. A few nights ago just before falling asleep, I started to wonder about putting separate cardboard boxes in the tote. The small postal boxes fit perfectly! I used 8 1/2 boxes. I cut them to 4" tall and used the leftovers to create dividers. This gives me the perfect solution, organized AND portable! Now I can color like a fiend for Kathy's 30Day Color Challenge! The Daily Marker
WHOLE HOUSE PURGE
Monday, April 20, 2015
I have been absent for a while due to a number of factors. The first being I have been sick with Epstein Barr, a sinus infection/cold and just can't seem to get rid of either one. When I have an episode of EBV I have no ability to create. It is stifles my creative mojo. So instead I try to catch up on other projects. My project/goal for this year is to do a whole house purge. I read "The Life-Changing Magic of Tidying Up: The Japanese Art of Decluttering and Organizing" and was very inspired. I started in our master bedroom closet and that took almost a week but it is done. I then tackled the guest bedroom closet and that was major as it has stuff that belongs to the kids (all adults and long gone from the house), our stuff, storage stuff. You get the idea. That took 5 days and I just finished. So far,I have made 4 trips with the car full of stuff to donate. I found a HUGE, I mean HUGE stash of needlepoint yarn which I need to sell on ebay and have just started listing. If you need any, I probably have it! So my creative space is a mess as you can imagine and I can't start any projects till I get some of this stuff OUT OF HERE! Hope to be back soon with cards and coloring.
5 MINUTE QUICKIE COLORING FOR 30 DAY COLORING CHALLENGE #ATTHEDAILYMARKER30DAY
Wednesday, March 11, 2015
I was sending my sister a check and I always like to put it in a cute card but I really only had about 7 minutes so I quick stamped and colored this one layer card. Used HERO ARTS OWH LIL HOOT and Copics. Sentiment not a great stamping job but I was really rushing and I know she won't care.
MAKE IT CRAFTY SPOTLIGHT COLORING CHALLENGE
An almost spectacular fail. Wow, this was really a hard challenge. Didn't quite get the elipse shape of the spotlight and my beam wasn't quite lined up. Will have to try this again.
Also, how do you get the shadow shapes correct??? I also noticed that as soon as I upload I see things that I don't when I am looking at the original. I should have put another white highlight on the right extended foot. More practice needed but I am committed to posting my learning processes and not just what I am happy with.
Also, how do you get the shadow shapes correct??? I also noticed that as soon as I upload I see things that I don't when I am looking at the original. I should have put another white highlight on the right extended foot. More practice needed but I am committed to posting my learning processes and not just what I am happy with.
30 DAY COLORING CHALLENGE #atthedailymarker30day
Tuesday, March 10, 2015
I flew home from NY on Saturday so obviously didn't get any coloring done and then I was jet lagged and just plain exhausted. Yesterday I was functional enough to finish coloring the Make it Crafty lilies that I started in NY and finished the card this am.
MAKE IT CRAFTY LILIES DIGI
MAMA ELEPHANT FEMME FRAMES
PAPERTREY INK SHIMMER CS
AVERY ELLE 120LB WHITE CS
COPICS
CLEARLY BESOTTED ALL OCCASION SENTIMENT
RANGER LIQUID PLATINUM EMBOSSING POWDER
WINK OF STELLA CLEAR
MAMA ELEPHANT FEMME FRAMES
PAPERTREY INK SHIMMER CS
AVERY ELLE 120LB WHITE CS
COPICS
CLEARLY BESOTTED ALL OCCASION SENTIMENT
RANGER LIQUID PLATINUM EMBOSSING POWDER
WINK OF STELLA CLEAR
30 DAY COLORING CHALLENGE #thedailymarker30day
Friday, March 6, 2015
Today is my last day in NY with my sister and I am quite sad to leave her but glad to get home to my hubby. In the midst of getting her resettled and packing, I took break and began to color this wonderful Make It Crafty digi. Zoe, I just love all these flower stamps! It is far from finished but I may get to work on it on my 5 hr. flight home tomorrow. Here is my coloring for today.
Copics used so far: E000, 35, 77: RV 10,11,13: YR24: YG07,45,63,67
30 DAY COLORING CHALLENGE DAY 2: #thedailymarker30day
Thursday, March 5, 2015
Brrr, it is snowy and cold on Long Island today so staying in (the hotel room) is just fine. One of the images I brought with me to color is this adorable Mo Manning digi printed on Xpress it paper. I thought I had more skin and hair colors with me .. but nope, I don't so here is my attempt with my limited supplies on hand. Left the little flowers uncolored so I can add some white and wink of stella when I get home.
Labels:
30 Day Coloring Challenge,
Copic Markers,
Mo Manning,
Onesies
THIRD ALCOHOL INK CARD
Monday, February 23, 2015
This is the third in the series of alcohol ink die cut cards. You can see the other two here and here.
MY FAVORITE THINGS HAPPY BIRTHDAY DIE
MEMORY BOX BELLA BOUQUET DIE
TIM HOLTZ ALCOHOL INKS
BAZZILL GOLD METALLIC CARD STOCK
DARICE SPARKLE GLITTER TAPE
BRONZE PAPER FROM STASH
Labels:
Alcohol Inks,
Birthday,
Memory Box,
My Favorite Things
ANOTHER ALCOHOL INK CARD: MEMORY BOX VESPERTINE BLOSSOMS
Tuesday, February 17, 2015
I love the elgance of these cards so much I made four of them! This is for my daughter-in-law's birthday. The technique is the same for all, see this post. The matching glitter tape is applied to card stock before die cutting. I had to cut the "Wishing" die so that it read "Wish".
And Lawn Fawn Milo's alphabet is perfect for creating your own sentiment (stamped in black and embossed with clear embossing powder).
CRAFTER'S COMPANION SHIMMERING CARD STOCK SILVER
MEMORY BOX VESPERTINE BLOSSOMS DIE
SIMON SAYS SENDING, WISHING DIES
LAWN FAWN MILO'S ALPHABET
RECOLLECTIONS SPARKLE TAPE
BAZZILL 40LB VELLUM
TIM HOLTZ ALCOHOL INKS
COUTURE CREATIONS ALORA EMBOSSING FOLDER
VALENTINE'S DAY CARD
Monday, February 16, 2015
Yes, I know, this is really late but......our internet was down from last Wednesday till Sunday afternoon (which I complained about loudly on Facebook) I have a bunch of cards to post that didn't get posted. I only made two Valentine's cards this year, here is the one I made for my hubby.
MFT WILD CHERRY CARD STOCK
PTI WHITE CARD STOCK
SIMON XOXO DIE
SIMON STAMPSET
SIMON STARS AND HEARTS DIE
COPIC SKETCH MARKERS
WOW CLEAR GLOSS SUPERFINE EMBOSSING POWDER
MEMENTO LUXE LOVE LETTER PIGMENT INK PAD
SCOTCH DIMENSIONAL TAPE
Labels:
Copic Markers,
Simon Says Stamps,
Valentine's card
MARKERPOP CHALLENGE: #62 ANYTHING GOES
Wednesday, February 11, 2015
Subscribe to:
Comments (Atom)


.jpg)


